Sunday, March 29, 2009

Aloo Paratha

I have got to say that making paratha's was really difficult and because I love making roti or chapati (Indian bread), I thought this would come naturally as well. My roti's don't come out round either, but atleast they are not as hard to prepare as these were. I was covered in flour from head to toe! I think this one of those Indian dishes that should be taught "visually" rather than read on a blog/recipe book. It requires some technique that should be shown under the guidance of someone who has had a lot of experience making them. I had to even throw out one or two of the little aloo balls before I attempted to flatten them. But I am still glad I made this dish. Its been one of my favorite things to eat since I was a little girl. My mom tends to make methi (spinach) paratha's more often than she does the aloo (potato). Since this is mainly a north Indian dish, it wasn't part of our everyday meals, but it was certainly a treat for breakfast. I will continue to make this and eventually hope to perfect it. Then, I can teach it my children one day. If you have a lot of time and don't mind getting your hands dirty- try this dish. Even thought it is difficult, it's delicious when prepared right.

Aloo Paratha:
adapted from http://veggiecookbook.wordpress.com
Stuffing
4-5 potatoes
1 tbs. cooking oil
½ tsp cumin seeds
1/4th tsp turmeric powder
2-3 green chillies, finely chopped
Handful of coriander leaves, finely chopped
1/2 tsp. Garam Masala
1/2 tsp. amchoor or dry mango powder (optional)
Salt to taste

Heat oil in a small frying pan and add cumin seeds allow them to crackle and remove from heat. Boil potatoes, cool, peel and mash the potatoes (You can pressure cook or microwave potatoes). Add all the ingredients for stuffing along with the fried seasoning and mix well. The mix should be dry, free of water. Otherwise, it will be difficult to roll out parathas. Keep the stuffing mixture aside.

Dough
2 cups wheat flour
1/4th cup wheat flour for dusting
1 tbs. ghee / butter / oil
Salt to taste
2 tbsp curd/ yogurt
Enough water to make dough
2-3 tsp ghee or butter for frying paratha’s


As the potatoes are boiling. Sieve flour. Add salt, oil or ghee, curd and Add water a little at a time. Knead into medium soft dough. Knead well for 5-6 minutes. This process can be done quickly in a food processor. Cover with a wet cloth and let the dough sit for 20-30 minutes. Knead the dough again

Creating the Paratha: Flattening the dough
Divide the dough and stuffing into balls of equal portions, now roll one ball at a time in the form of a cup. Now put a small quantity of above stuffing (potato filling) over it, close it from all sides.Gently pat the stuffed "cup" in the palms, apply some flour on both sides and roll it gently into a paratha.Now cook on a frying pan, allow one side to cook when the color changes into light brown color.Turn repeat for other side. Drizzle some butter or ghee on each side and flip. Serve hot with Yogurt or Indian pickle.

Monday, March 23, 2009

Two Burgers in a Bun


 I have a small confession to make. I crave McDonald's on a weekly basis. Yes, I know that they aren't that great for you, but I can't seem to help my obsession for one of their juicy burgers! My town is void of fast food restaurants, which in a way is great for us as it forces me to venture out on my own when I crave greasy food. My results however, are much healthier and way more delicious. These burgers were so easy and I can't wait to make them again.

Two Burgers in a Bun
1 lb of lean ground beef
2 tablespoons of worcestershire sauce
1 teaspoon fresh rosemary
1 tablespoon lite soy sauce
sliced cheddar cheese pieces
salt & pepper to taste

Preheat oven to 250 degrees.
Mix all ingredients (except cheese) in a bowl. Make small patties, approximately 2 1/2" in diameter. Grill or broil on high heat for approximately 4 mins on each side (even less depending  on how you like  them done). Top with individual cheese slices and put in oven for about 6 mins. Place on sliced dinner rolls. In my case "horn-y bread."

Wednesday, March 18, 2009

Raspberry CoffeeCake

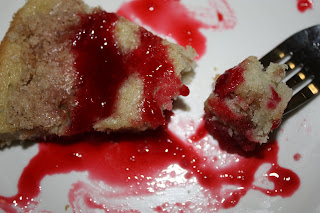
MmmhmMmmmm...raspberry. I love all berries, but most of all raspberry. Mainly because its red, and red happens to be my favorite color. So,I don't usually plan for desert. My trip to the supermarket always includes some choice ingredients for a desert that I will mix and match later on during the week. Its all about making a quick cookie, cake or pudding for that sweet satisfaction. On my last excursion I grabbed a bunch of frozen raspberries and decided to give this cake a try. This recipe did not call for the sauce, and I ended up substituting the fresh for frozen. So, that left me with extra raspberries in its juice. I figured it couldn't hurt to have some sauce over the cake in case it turned out dry. I got this recipe from joyofbaking.com My favorite baking website. This is a tarty coffee cake and I sprinkled some vanilla sugar on top before I baked so that it would add an extra sweet flavor. Honestly, it can be made with any berry, whatever you have on hand. This cake is absolutely delicious if you enjoy the tart.
Best part about any berry are the antioxidants!

Raspberry Coffeecake with Sauce
Streusel Topping:
1/3 cup all purpose flour
1/3 cup granulated white sugar
1/2 teaspoon ground cinnamon
1/4 cup cold unsalted butter , cut into pieces
Cake Batter:
1 cup all purpose flour
1 teaspoon baking powder
1/8 teaspoon salt
1/4 cup unsalted butter, room temperature
1/2 cup granulated white sugar
1 large egg
1/2 teaspoon pure vanilla extract
1/3 cup milk
2 cups fresh/frozen berries (any)

Preheat oven to 350 degrees F (177 degrees C). Butter an 8 inch (20 cm) spring form pan and line the bottom of the pan with parchment paper. Set aside.


Streusel topping: In a large bowl, mix together the flour, sugar,and ground cinnamon. Cut in the butter with a pastry blender or fork until it resembles coarse crumbs. Set aside while you make the cake batter.
In a separate bowl whisk together the flour, baking powder, and salt. Set aside in the bowl of your electric mixer, with the paddle attachment, cream the butter. Add the sugar and beat until light and fluffy. Add the egg and vanilla and beat until incorporated. Add the flour mixture, alternately with the milk, and beat only until combined. I also added some of the raspberry juice into the batter. Spread the batter into the bottom of the prepared pan, smoothing the top with an offset spatula.
Evenly arrange the berries on top of the cake batter and then sprinkle with the streusel topping
Bake for about 45 - 50 minutes or until a toothpick inserted in the center of the cake comes out clean. Remove from oven and place on a wire rack to cool slightly.


Raspberry Sauce
:: Because I used frozen raspberries, I had the juice left after I had used it for the cake. I took the left over juices with the raspberry and set it to boil. I added about two tablespoons of honey and about a 1/3rd cup of sugar. After the sugar was mixed in completely , I poured it over a sieve and strained our all the seeds. What was left over was a sweet red sauce. Serve over anything- especially CAKE! ;)

Saturday, March 14, 2009

Green Masala

I am so annoyed at myself. I had this post all ready to go, when I accidentally hit something and POOF! there goes my post! ARGH. Therefore this post is going to be short and sweet. Green masala is the marinade my mother makes to jazz up pretty much anything. You can make chicken curry, kabobs, pulao, shrimps.. with this masala. She used to put it in lil' baggies for me, and I would freeze it. When I came home from work, all I had to do was defrost it and let it marinate (usually with chicken).
Try it! green chillies however can be potent, so use carefully.


Green Masala
*Handful of cilantro
*table spoon garlic paste (can sub for whole)
*tablespoon ginger paste (can sub for whole)
*2-3 green chillies (can be found at the Indian markets)
*salt & pepper to taste
**Mint (if you want to marinate lamb)

Add all to a food processor. Blend. Marinate with salt.

Sunday, March 8, 2009

Rosemary-Balsamic Vinaigrette

Its Sunday evening, and I have officially taken a slight break from cooking. This week, I will be taking a mini vacation and be heading over to my parent's home. Where hopefully my mom will whip out some fantastic meals that I can photograph. I am so excited to say the least! I must confess, that one of the major reasons I started blogging is so that I can have an accurate record of my mother's recipes. So, last Friday night's meal was the last time my kitchen saw any action. The result was an amazingly light and delicious salad dressing. In an effort to make a healthy meal without any pasta or rice, I made Chicken Marsala (this will be up later on)and served it with fresh greens and home-made vinaigrette. Because rosemary is my best friend, I added some of the spice to give it a more fragrant flavor. I am on a tight budget lately, well with the recession and all, why bother spending even $3 on a salad dressing when you can make one at home that is easy and delicious?

Rosemary-Balsamic Vinaigrette
adapted from Emeril Lagasse on Foodnetwork.com

Ingredients
1/4 cup balsamic vinegar
1 medium garlic clove, pressed
1 sprig of rosemary
1/2 teaspoon salt
1/2 teaspoon freshly ground black pepper
1 teaspoon dijon mustard
3/4 cup olive oil

Mesclun salad mix or favorite greens, for accompaniment

Directions
Beat the vinegar in a bowl with the, garlic, dijon, rosemary, salt and pepper. Then beat in the oil by droplets, whisking constantly. (Or place all the ingredients in a screw-top jar and shake to combine.) Taste and adjust the seasonings. I used a food processor to mix everything
Toss a few tablespoons of the dressing with the salad mix and desired salad ingredients, and serve immediately.
If not using dressing right away, cover and refrigerate, whisking or shaking again before use.
.
Posted by Picasa

Friday, March 6, 2009

Varan (Yellow Lentils) and Fried Tilapia

For the better part of my childhood, I grew up in Mumbai. Mumbai is a lot like New York, a huge metropolis of people from all over India. Mumbai is also in the state of Maharashtra. My father's family are pure Maharashtrians. After living in NY , where there is such a great versatility of food I rarely find Maharashtrian food on any Indian restaurant menu. So if I want to indulge, I have to cook it! Varan Bhaat(toor daal & rice) to me is the ultimate comfort food. Our mother's fed it to us as one of our first solid foods, when we were sick, or just on a perfect Sunday with some lamb on the side. For me, Varan is a dish I associated with my father. He is the one that fed it to me in mouthfuls most of the times. Its the fish, that reminds me of my mother. She is from Goa, but grew up in Mumbai . Goa and Maharashtra - neighboring states though they may be, their dishes vary vastly. It was only natural that my mother combined Varan and Fried Fish. We have been eating this for a long time at home. I have been making it for a few years. Its our family recipe, and its perfect for a weekly meal. My husband enjoys it, and he is Jewish. LOL.

Varan (Yellow Lentils-Toor)
1 cup Toor Daal
1 cup Water
pinch of Asofedita (hing)
1/2 teaspoon Turmeric powder (haldi)
2 teaspoons sugar
1 teaspoon salt

Equipment
Pressure Cooker (You can make any lentils without a pressure cooker, it just has to simmer on low heat for at least over an hour to get the desired consistency. The pressure cooker mushes up the lentils in about 20 mins)

Add daal + water in the pressure cooker. Top it off with asofedita and turmeric powder. Close the lid of the cooker and cook over medium heat till about 2 whistles (should be about 20 mins or so). Wait till all steam has escaped from the cooker before you open it!!
The daal should be mushy and a bit watery at this point. If it's dry, add some more water and let it simmer for a while till the desired consistency. If its still watery, dry it out by simmering some more. Add salt and sugar. Stir.


Fried Tilapia with Fresh Tamarind

2 fillet's of fresh tilapia
1 tablespoon turmeric
1/2 tablespoon (increase for spiciness) red chilli powder
1/2 cup Rice flour for coating
Salt to taste

Marinate the Tilapia with the turmeric, chilli powder & salt. I would do this before you make the daal. This way you have at least half an hour to let the fish marinate. Now, you can start either making the tamarind juice. If you have bought the tamarind paste, skip this step. Just mix the paste with a little bit of water to coat the fish later.


Fresh Tamarind Juice
Soak about less than handful of Tamarind in hot water that reaches just the tops of the tamarind (not toooo much)wait 5-10 minutes. The tamarind should be soft enough to make a thick pulp now. Keep mixing the tamarind in between your hands to get its juice out, and soon enough it will turn thick and pulpy (remove the skins of the tamarind, if they exist)
Get rid of anything that is not dissolving into the water.


Lets Fry the Fish!

After the Juice/Pulp is ready, dip the marinated fish in the pulp and coat it with the rice flour. Fry in little oil for about 4 minutes on each side (Tilapia will cook fast , depending on your gas settings)

Serve with Daal and Rice
Posted by Picasa

Thursday, March 5, 2009

Yogurt Berry Smoothie

Everyone who knows me, understands that I love shopping for food. Since I love to cook even more, its only natural that I spend most of my time in a super market. I can get stuck in the spice section for 30 minutes! No wonder my husband hates it when I drag him to Whole Foods. Lately I have been traveling to a neighboring town (my X neighborhood) to a local gourmet food store to purchase some fresh veggies. Because I spent over $25, I got to a free 1lb box of strawberries. Yum. I did not learn about these free strawberries till my register rang $47.30. So as I was walking through the isles, picking up veggies for marsala and salad that I want to make for my Friday night dinner, I came across these strawberries and they were the freshest bunch I had seen. So, I was ecstatic when I was told that I could just pick up a bunch for free. I wonder if I had bought a piece of chocolate to total out $50, I could have gotten away with two?
Anyway, 2 days ago, as my husband phoned to ask me if I needed something from the supermarket, I quickly added that I needed plain yogurt. Later did I realize that in fact this was a bad choice because I can't make anything with Yogurt that won't interfere with his digestive tract. I certainly was in no wasting mood. So, I blended. This was part of my delicious breakfast this morning. If you need, you can add some ice cubes to make it a bit cold and crunchy. I like my drinks room temperature. Slurp!

Yogurt Berry Smoothie
1 cup plain low fat yogurt
1/2 lb strawberries (or any other fruit you prefer)
2 tablespoons honey
1 tablespoon sugar
Ice cubes if required.

Blend. Pour. Drink.
Posted by Picasa

Wednesday, March 4, 2009

Herb Crusted Chicken Breast over Marinara

Italian food is absolutely delicious and so versatile. Its so hard for me to resist buying all the fresh pasta and different types of sauces from Whole Foods. Since, I am very much trying to keep within my grocery budget, I decided to buy a few just plain ol' marinara sauces and then later on embellish the sauce to give it a fresh taste. Spaghetti or Linguine is a staple for our weekly night dinner but the box of ziti was calling my name. Tonight, I went back to an old classic and made it my way. Last year, I would have topped this off with cheese to make it a chicken parm, because hubby can't eat cheese so I have included some aged parmigiano reggiano in the crust itself which makes this dish lactose free. This is an absolutely mouth watering dish, that can be edited to fit your needs as you go along. I got the idea from Rachel Ray on foodnetwork.com, and made my own modifications from it.

Herb Crusted Chicken Breast


Ingredients:
*Olive oil for frying
*1 1/2 pounds chicken breast
*Salt and pepper to taste
*1 cup all-purpose flour
*2 large eggs, beaten with 1/4 cup water or Milk
*2 cloves garlic, pressed

Breading:
*2 cups Italian style bread crumbs
*1 cup shredded parmigiano reggiano
* 2 tablespoons of dried Italian seasonings
*1 teaspoon crushed red pepper flakes


Preheat oven to 300 degrees F. Place a nonstick cookie sheet in oven with a tin foil liner.Heat 1/2-inch oil in a large nonstick skillet or frying pan over medium to medium high heat. Season chicken breasts with salt and pepper and 2 pressed garlic cloves. Place flour in a shallow dish. Beat eggs with water in a second dish along side the flour. In a third dish, combine the breading ingredients. Coat chicken in flour, then egg, then bread and cheese mixture. Cook chicken until deeply golden on each side, 3 to 4 minutes. Transfer to cookie sheet in preheated oven and finish off for another 20 minutes cooking time. Check on the chicken, if the pieces are thick you may need to leave in there for another 10 minutes extra. I brought the oven down from 300 to 200 and left it in there for another 15 mins. This way my chicken will still be hot when I served dinner Serve chicken with your own pasta and sauce version. Mine is as follows

Simple Tomato Sauce
Ingredients:
*1 bottle of plain marinara sauce
*1 whole peeled & shredded carrot
*1 medium white/red onion, sliced
*2 medium pressed garlic cloves
*any other vegetable (squash, eggplant,mushrooms) will do too
* salt & pepper
* 1 tablespoon oil

Heat oil in a medium sauce pan and sautee garlic and onions for about five minutes or till onions start to soften. Add vegetables and sautee some more. Pour in the marinara sauce and reduce heat to slow. Mix well and heat the sauce till desired temperature to serve over pasta.
Posted by Picasa

Monday, March 2, 2009

Torta Di Ricotta Cheesecake

Cheesecake. Scrumptious & Delicious...
Torta Di Ricotta was a project I adopted in my mind a few weeks back. My husband's grand father was turning 85, and he is one of the sweetest people I have ever met. So, I wanted to get him something that was close to my heart, and baking something for him seemed rightly apt. This is his favorite cheesecake that he orders it for desert every time we go for dinner. I have never before had a Ricotta cheesecake before I baked one. I got this recipe from userealbutter.com This cake did not sink too much, nor did it form any cracks. The water boiling right underneath the pan definitely helped with the moisture content. So, do not skip that step. Since the crust came up only halfway to my pan I had some filling left over. This I ate later, alone and it was heaven!

I really hope you enjoy it as much as I did making it. Its a long process, and you can decorate it anyway you would like. Just follow the instructions and be patient. This cheesecake is light & fluffy and a perfect hit for a family gathering! Go ahead, try it.

Pastry

*2 cups all-purpose flour
*3/4 cup butter, softened
*1/4 cup sugar
*2 tbsp dry Marsala wine
*1/2 tsp salt
*2 large egg yolks

Filling
*32 ounces ricotta cheese
*1 cup sugar
*1 cup heavy cream
*1/4 cup all-purpose flour
*1 tsp vanilla extract
*1/4 tsp salt
*6 large eggs
*grated peel of 2 medium oranges
*grated peel of 2 lemon


In a large bowl, beat all pastry ingredients together on low speed until just mixed. Shape dough into a ball and wrap in plastic. Refrigerate for 1 hour.

Preheat oven to 350F. Press dough into a 10-inch springfoam pan - on the bottom and up the sides. Bake the crust 15 minutes until golden. Cool in pan on wire rack.


While crust is cooling, prepare the filling. Press ricotta through a fine sieve into a large bowl. Beat the ricotta on medium speed until smooth. Slowly beat in the sugar, scraping the bowl often. Add cream, flour, vanilla, salt, eggs, orange and lemon peels and beat until well blended.

Pour mixture into crust। Bake for 1 1/4 hours (I suggest placing a baking pan of water on a lower rack to prevent rifting of your cake surface). Turn the oven off and let cheesecake remain in oven for 1 hour. Remove from oven and let cool completely on wire rack. Cover and refrigerate for at least 4 hours or until well-chilled. When cheesecake is firm, loosen from pan and remove to a serving plate. Sprinkle with confectioners sugar or top with fresh fruit.


Posted by Picasa