Wednesday, April 29, 2009

Chocolate Cake & Mango Ganache


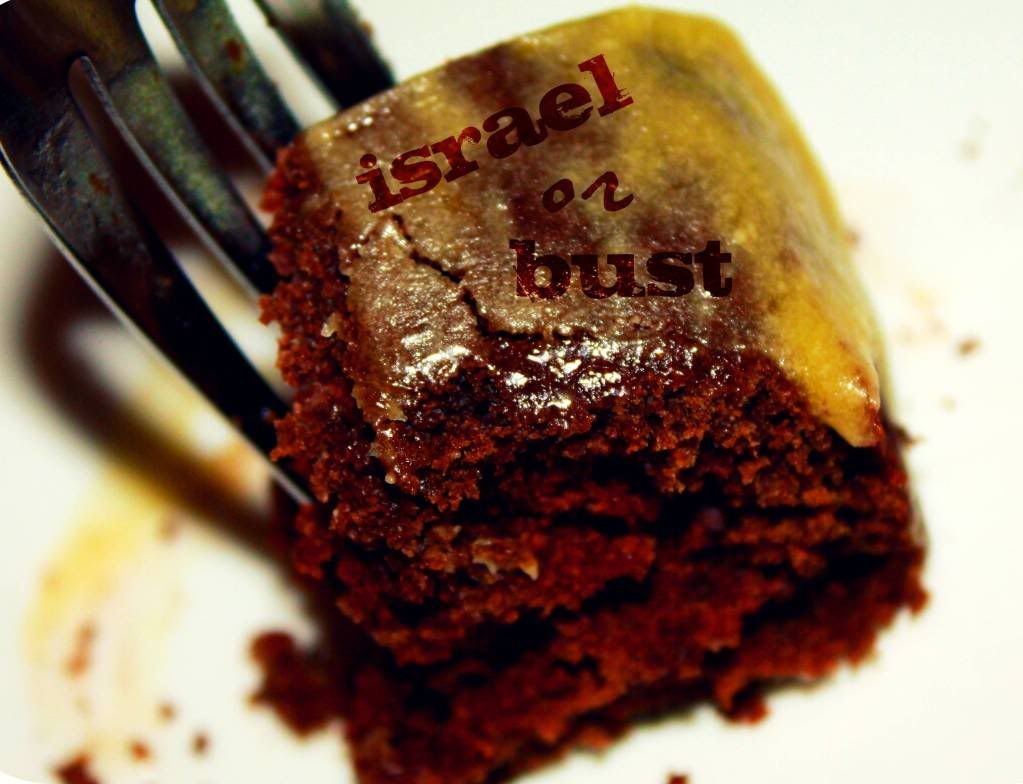
Yup! We are going to Israel this summer for vacation. I cannot contain my excitement!  I am leaving this Friday, and wont return for 2 weeks. Therefore, I want to leave all my readers with a dangerously addictive mix-in-pan-eggless-chocolate-cake. All my desserts have some basic chocolate flavor to it recently, and that is because chocolate has been on mind- A LOT! Hopefully getting a change of scenery, will help inspire some  new dishes. I have a feeling I may also post from Israel as I am taking my laptop with me.

Most of what I bake on my blog is from JoyofBaking.com A FABULOUS baking website and just my style.


A story about the Mango Ganache: It was supposed to be Mango frosting but it turned into ganache. I never made frosting before because I don't like decorating cakes or desserts much. I find it time consuming, but you may have guessed that by now because most of my recipes are super simple. Anyway, I had a mango staring at me in the fridge, calling out my name! Ok, so when I somehow ruined tried the recipe, I had no idea at what point frosting becomes frosting.  Anyway, I completely freaked out  that even after adding so much sugar, the consistency would not harden. It was making me sick. I couldn't go on any further,  so I left the soft consistency and managed to chill it in fridge long enough for it to become a mangoish glaze over the chocolate cake.

SO, I guess I will see you all on the other side of this break?
In the meantime, I hope I have convinced you to make this cake, and EAT IT!

Chocolate Cake
Adapted from Joyofbaking.com

1 1/2 cups  all purpose flour
1 cup  granulated white sugar
1/4 cup unsweetened cocoa powder (not Dutch-processed), sifted
1 teaspoon baking powder
1 teaspoon baking soda
1/4 teaspoon salt
1/3 cup unsalted butter, melted
1 cup warm water
1 tablespoon lemon juice (or vinegar)
1 teaspoon pure vanilla extract

Preheat the oven to 350 degrees F  and place rack in center of oven. In an ungreased 8 inch square cake pan, stir together the flour, sugar, sifted cocoa powder, baking powder, baking soda, and salt. Add the melted butter, water, lemon juice, and vanilla extract. With a fork, mix all the ingredients together until well blended. Bake in preheated oven for about 35 minutes, or until the cake springs back when lightly pressed and a toothpick inserted in the center of the cake comes out clean. Remove from oven and place on a wire rack to cool.


Mango Frosting Ganache


1/2 cup butter, softened
1/2 cup mango puree(blend mango chunks in blender with sugar)
Zest and juice of 1 lime
  
4-5 cups of powdered sugar (i ended up using 6 cups & stopped)
In a mixing bowl, cream butter until light and fluffy. Add mango puree, zest and juice. Mix well. Add powdered sugar, 1 cup at a time, until desired spreading consistency is reached. My consistency never reached a peak. After a while, adding more powdered sugar just made it too sweet. I didn't want my chocolate cake to be overpowered by a "too-sugary" frosting/ganache. I also chilled it for about 1 hr, before applying on cake.  This particular recipe created a whole lot of ganache, I think one can easily half the quantity for a regular cake.

ice.eat.enjoy!

Saturday, April 25, 2009

Stuffed Peppers

Today's Note: Blogger has been getting on my last nerves!. My comments button is very moody and sometimes doesn't show itself on certain posts. How RUDE! I have tried everything under the sun, and sometimes the box just ain't there. So, sorry readers that want to but can't comment on some posts. Till I get this fixed, you can always email me at, Resh.Mah@gmail.com thanks :)

So, back to the recipe at hand:
I am sure that there are many different types of dishes that you personally have not yet tried. I €don't mean that you haven't tried them yet because you haven't visited the country. It could be a dish at a Chinese restaurant that you never ever order, but wonder what it would taste like? That's how I felt with Stuffed Peppers.

Actually, the first time I saw it being cooked, I drooled just watching them simmer. Israel introduced me to this easy-to-stuff quick meal that was mouth watering from start to finish. My husband's grandfather insisted that we eat proper dinner every night when we visited, and we started with Stuffed Peppers. It took me a while after eating this dish for the first time to make it again in my home. I tried to find an Israeli version of this, but was unsuccessful. After a few trials & errors this recipe has perfected itself. Its hearty and I have learned to add a variety of veggies to it so that the taste doesn't bore us. I am going to try making this with couscous and fresh veggies for all my vegetarian friends, so look out for that.
I know that there are many variations to this dish, any ideas would be welcome :)
Enjoy. Perfect for a Monday night meal.


Stuffed Peppers
2 medium green peppers
1/2 lb of ground beef or chicken
1/2 cup cooked white rice
2 cloves crushed garlic
1/2 cup chopped veggies (mushrooms, carrots, squash)
1 tspn italian seasonings
1 medium chopped onion
2 tblspn Worcestershire sauce
1 cup tomato sauce
Salt & Pepper to taste

Equipment:
Steamer

Remove and discard the tops, seeds, and membranes of the bell peppers. Steam the bell peppers till slightly mushy ( about 10 mins ) and place in a baking dish. In a medium sauce pan, heat up a tablespoon of vegetable oil and sautee garlic and onions together till the onions are soft and translucent. Add the veggies and spices and sautee the vegetables till the mushrooms give off some liquid. To this, add the ground meat along with salt & pepper. Mix all and brown the meat for about 10 minutes. Add tomato sauce and let the mixture come to a slow boil. Remove from heat, mix in rice and add the worcestershire sauce. Blend well and stuff into each pepper. If desired, top with cheese and bake 10 minutes on 350, otherwise dive in!


Tuesday, April 21, 2009

Green Chicken Pulao


My mother never has to look at recipes to know just how to optimize on a single marinade and incorporate it into several different varieties. Green chicken pulao (rice) is just that perfect example. As she made this, I noted it all down. I love her little lessons. She goes real fast!! I had to be quick enough to ask her questions at the right time and make remarks as necessary. This dish is fairly easy if you have that stuff lying around. I tend to make the green masala and freeze it (another good idea from my mother). This way I always have the masala to make a quick Indian meal.
Green Chicken Pulao
1 lb chicken breasts, cut into pieces
Marinate this chicken in green masala
1 cup yogurt
Rice:
1 cup long grain basmati rice
1 teaspoon whole cloves
3 medium red potatoes, cut in chunks
1 medium diced onion
1/4th tspn turmeric powder
1 tsp coriander powder
1 tspn cumin powder
salt to taste
1 tblspon vegetable oil

Boil potatoes in a large pot till about moderately tender (around 15 mins the fork should easy slide in, but the potatoes should not be too soft). In a mixing bowl, mix together yogurt, chicken &  green masala. Let marinate for 30 mins in the fridge. At the same time, in another pot, add onions and sautee till soft. Add cloves, and the balance of the dry spices (including salt); satuee the onions some more till all the spices blend. Add chicken, mix well alltogether. The yogurt should make a nice creamy blend. No need to add extra water at this point. The chicken should start cooking now. Keep a close eye on the chicken curry, if it tends to dry a bit, then you may add some water. Add rice after 15 mins or so, cover & cook for another 20 mins. The rice should fluff up when cooked and the chicken should be tender. Serve with raw onions marinated in lemon & salt.


Thursday, April 16, 2009

Chocolate Chunky Cookie


Chunky cookies are my absolute favorite. It doesn't matter what kind of cookie it is, as long as it has nuts/raisins/choco chunks/ etc.. I could go on. Any simple basic cookie is transformed with the addition of different chunks. This week's craving was chocolate. So the hunt for a good chocolate cookie began! I wanted to find a basic one that would easily fulfill my craving. Anyone who knows me  also knows that chocolate is my sweet spot. So what better than a chocolate cookie mixed in with a little fruit n' crunch? I found this recipe on joyofbaking.com, and added the cranberry-pecans because that is what I had handy. Try your version and add your own crunch to this chocolatey fruity cookie.

Chocolate Cranberry-Nut Cookie
adapted from joyofbaking.com

1/2 cup unsalted butter, room temperature
1/2 cup light brown sugar
1/4 cup white granulated sugar
1 large egg
1 teaspoon pure vanilla extract
1 cup all purpose flour
1/4 cup cocoa powder
1/2 teaspoon baking powder
1/8 teaspoon salt
1 1/2 cups mix of whatever you desire ( I used cranberry & pecans)
Pre-heat the oven to 350 degrees. Line two baking sheets with parchment paper. In the bowl of your electric mixer (or with a hand mixer), cream the butter and sugars until light and fluffy (2-3 minutes). Add the egg and vanilla extract and beat until incorporated. First sift together the cocoa powder, flour, baking powder, and salt and then add to the butter and egg mixture. Mix just until incorporated.


Fold in the the cranberries and pecans. Using a small ice cream scoop or two spoons, place about 1 1/2 tablespoons of batter on the prepared baking sheet, spacing about 2 inches apart. Bake for approximately 8 minutes or until the the cookies are still soft in the center but are firm around the edges. Remove from oven and let cookies cool on baking sheet for about 5 minutes before removing the cookies to a wire rack to cool completely.
Posted by Picasa

Friday, April 10, 2009

Balsamic Baked Salmon


Eventhough there was always plenty of fish around me, I lacked an appetite for it. Till this day, I only eat Salmon, Tilaplia and the occasional Tuna from the can. It's because of this recipe that I like Salmon and have ventured on to other such versatile dishes. This recipe was my gateway to an "american" style of eating fish. It's really very simple and so easy. If you cook it for that exact amount of time in the oven, it will produce a very supple, flaky, moist fish. I love making this once every two weeks, so that we don't get bored of it. I have been making this for three years now, as I always have the ingredients at hand. My husband brings the fish home from work, so that its always fresh when we eat it. You can try this with wild salmon (but I personally do not like the denser taste). The panko breadcrumbs gives it an amazingly crumbly texture- one that regular bread crumbs can't replace. Ofcourse, if you don't have panko handy, you can sub for bread crumbs but make sure that next time you try it with panko. Salmon is a great heart healthy fish. Give it a try. Its best served over a bed of rice/couscous.

Balsamic Baked Salmon
2 6oz. salmon fillets
2 tblspn balsamic vinegar
2 tablspn dijon mustard
1/4th cup panko bread crumbs
salt & pepper to taste

Preheat the oven to 350 degrees. Season the fillets with salt & pepper then pour the balsamic vinegar over them evenly.  Gently spread the mustard over the tops of the fillets with a butter knife. Top with panko bread crumbs. Place in the oven for exactly 22 minutes or until the fish flakes.
Posted by Picasa

Monday, April 6, 2009

Moist Black Mission Fig Cake


My father loves figs. I never personally ever found this fruit appealing in the least. Growing up, I chose "brighter" fruits. I chose mangoes, guavas, papayas & pomegranates. Figs lacked the visual appeal I needed in order to try new fruits. Recently though I discovered that figs are packed with nutrition. This cake looked so good when I found the recipe on bread &honey, that I had to try and make my own version. Figs are delicious, healthy & a wonderful afternoon snack. I also added a bit of flaxseed powder for a power boost! BAM! high-fiber cake that tastes out of this world! This cake though, is moist because of its buttery goodness. I should have added more figs to compensate, but there is always next time right? I know that I will be making this cake often with different dried fruits.

Moist Black Mission Fig Cake:
adapted from bread-and-honey.blogspot.com
Ingredients:

16 tablespoons (2 sticks) unsalted butter, softened
1 1/2 cups granulated sugar
1/4 cup honey
4 large eggs
1/4 th cup yogurt
3 cups all-purpose flour
1 3/4 teaspoons baking powder
1/2 teaspoon salt
1 cup chopped dried black mission figs
2 tablespoons firmly packed brown sugar
2 tablespoons flaxseed powder (optional)
Directions:
Preheat oven to 350 degrees F. Grease a 9 or 10-inch Bundt pan and dust with flour.With an electric mixer, beat the butter until smooth, 1 minute with a stand mixer or 3 minutes with a hand held mixer. Add the granulated sugar and honey and mix until blended. Mix in the eggs one at a time, combining well between each addition. Stir in the yogurt.

In a separate bowl, mix together the flour, baking powder, salt & flaxseed powder. On low speed, add the dry ingredients to the butter mixture and mix until combined. In a small bowl, mix together the figs and brown sugar.

Spread one-third of the batter into the prepared pan. Place half of the figs evenly over the batter. Gently spread another third of the batter on top. Spread the remaining figs and then the remaining batter in the pan.

Bake the cake until a skewer inserted in the middle comes out clean, about 45-50 minutes. Be sure to test a couple areas in the cake. If you skewer a fig the skewer will be wet. Let the cake cool for 15 minutes. Unmold by placing a large plate on top of the pan, inverted the pan and plate together, and then removing the pan.


Posted by Picasa

Thursday, April 2, 2009

Home Made Chips


I don't ever make enough side dishes! The thing is that as much as I enjoy cooking, I don't like being in the kitchen too long. If I was living in India maybe the story would be different. I would have a bunch of maids wold do the cleaning while I concentrate on the cooking. So side dishes = extra cleaning. Yuck! Since I am completely OCD about leaving my kitchen immaculate, I end up spending hours in the kitchen. My side dishes sometimes are frozen or steamed veggies. Today however, I did not have anything that would taste delicious with a grilled chicken sandwich (will post soon). I wanted potato chips. I had potatoes, so why not? This is very easy to prepare but slightly annoying as you have to keep checking in so that the potatoes don't burn completely except on the edges but still stay crispy all over.

Potato Chips
3 medium sized idaho potato
3 tablespoon melted butter
2 teaspoon rosemary powder (or fresh)
2 medium cloves of garlic, pressed
salt & pepper to taste

Equipment:
Mandolin

Directions:
Preheat the oven to 350 degrees.
Slice the potatoes very thin through the mandolin. I experimented a little bit and found the right "thickness" that I prefer, you may have to do the same. In a bowl, mix together all ingredients. Spread each slice on a baking sheet and bake for about 8-10 minutes. Keep checking in to see if the edges have browned, and remove once desired crispiness has been achieved.
Munch.